
This post may contain affiliate links. Please read our disclosure policy.

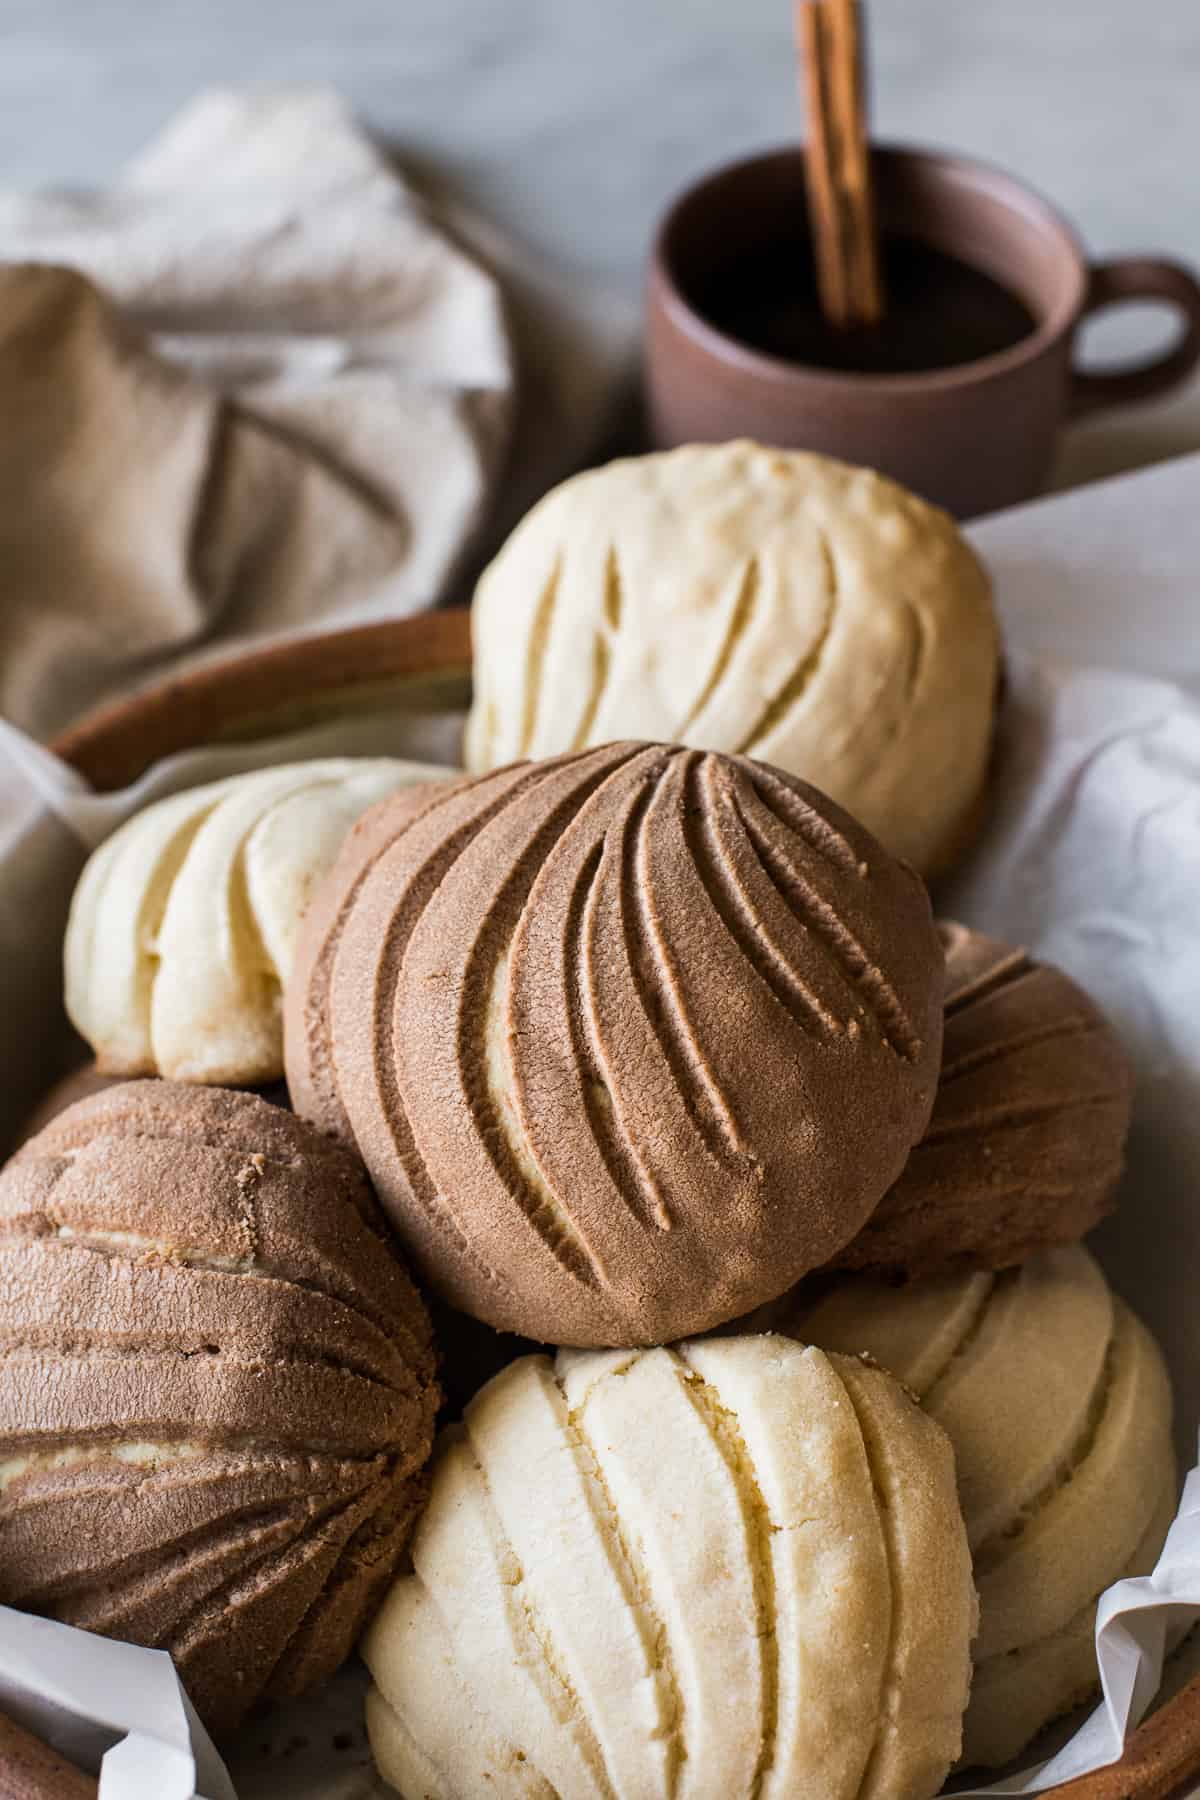
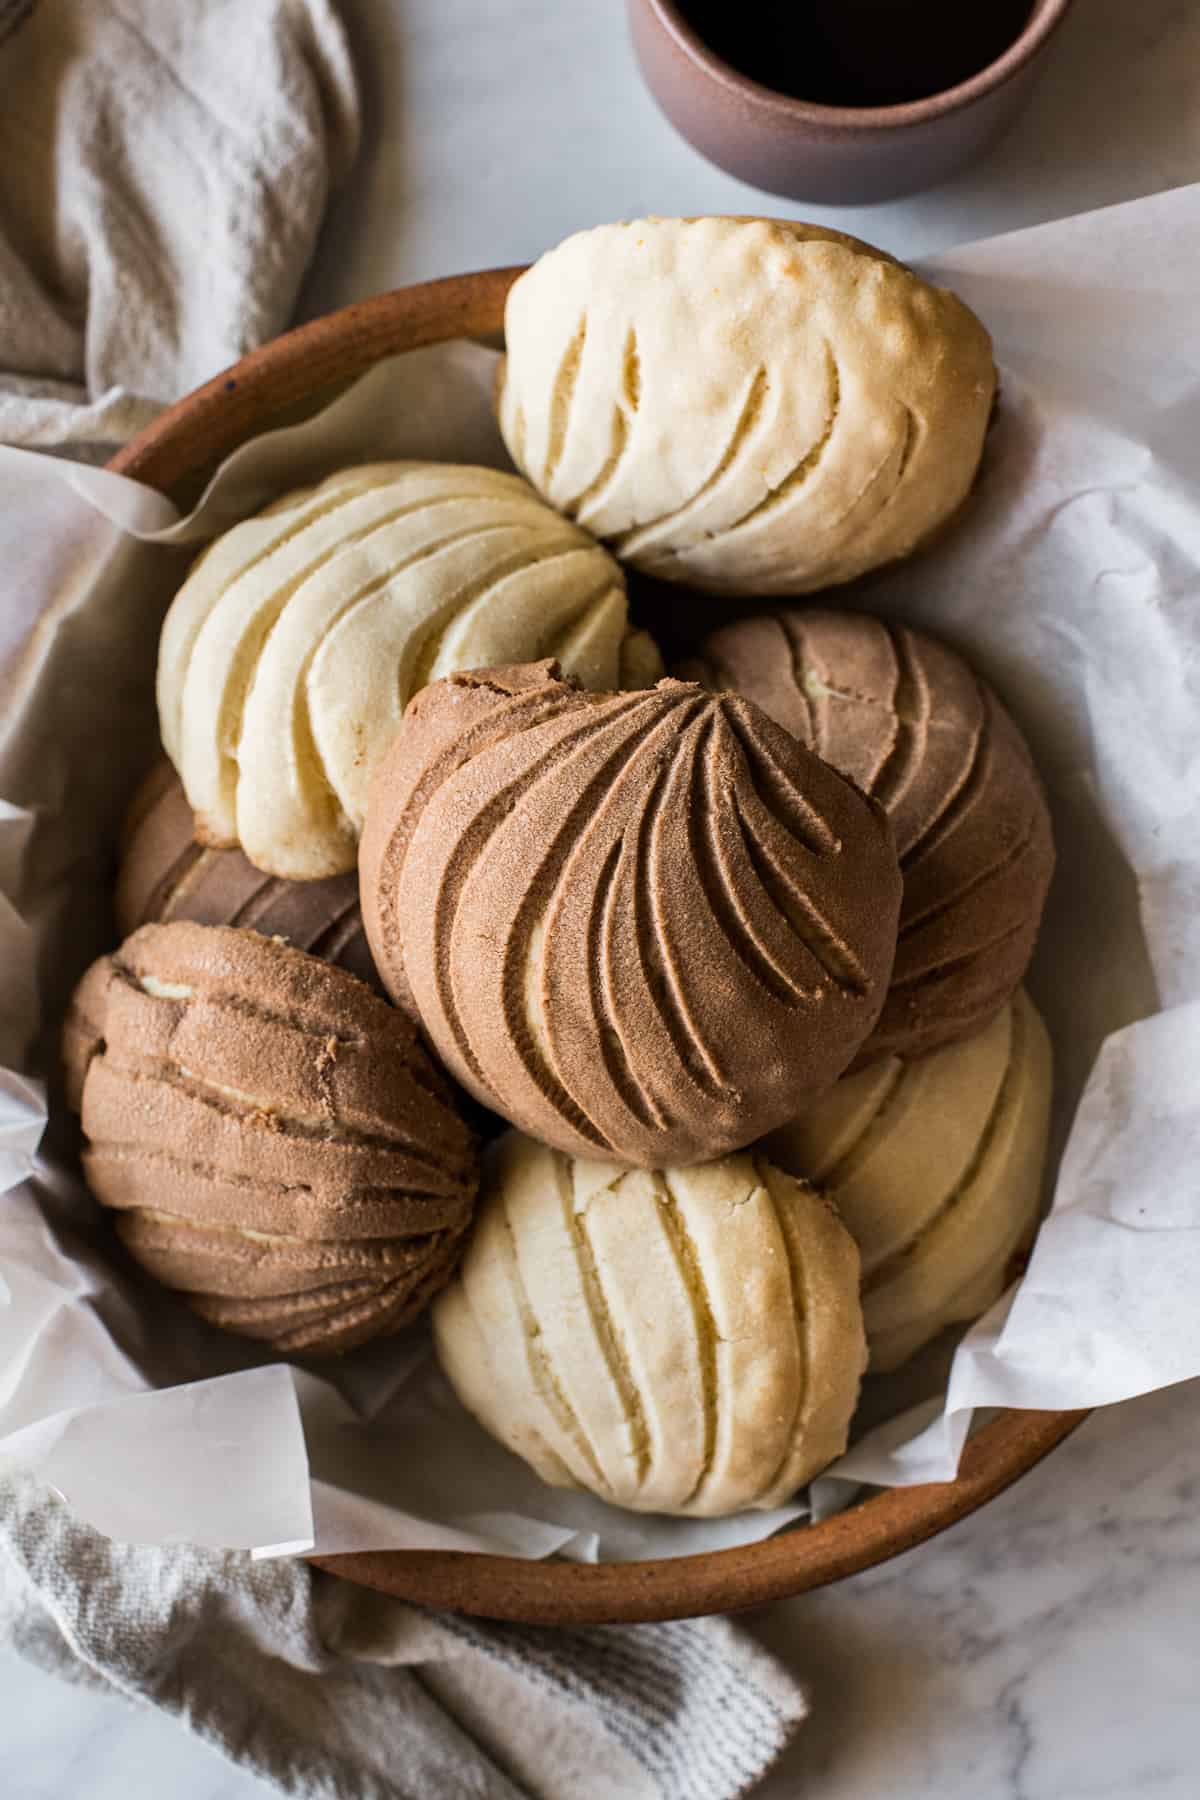
These sweet and fluffy Conchas are one of the most popular types of pan dulce in Mexican panaderias! Here’s how to make this sweet bread at home.
[ez-toc]
Conchas are one of my favorite types of Mexican pan dulce, and I know I’m not alone!
I’ve been eating conchas my entire life, and to this day, someone in my Mexican family always brings a bag of assorted pan dulce to family get-togethers on Sundays. Naturally, there are always lots of conchas in the mix as well as other favorites like cortadillos, marranitos, and Mexican donuts (donas).
If you’ve never heard of conchas before, you’re probably wondering…
What are conchas?
Conchas are a popular type of pan dulce (or Mexican sweet bread) that’s commonly sold in panaderías (or bakeries) across the U.S. and Mexico.
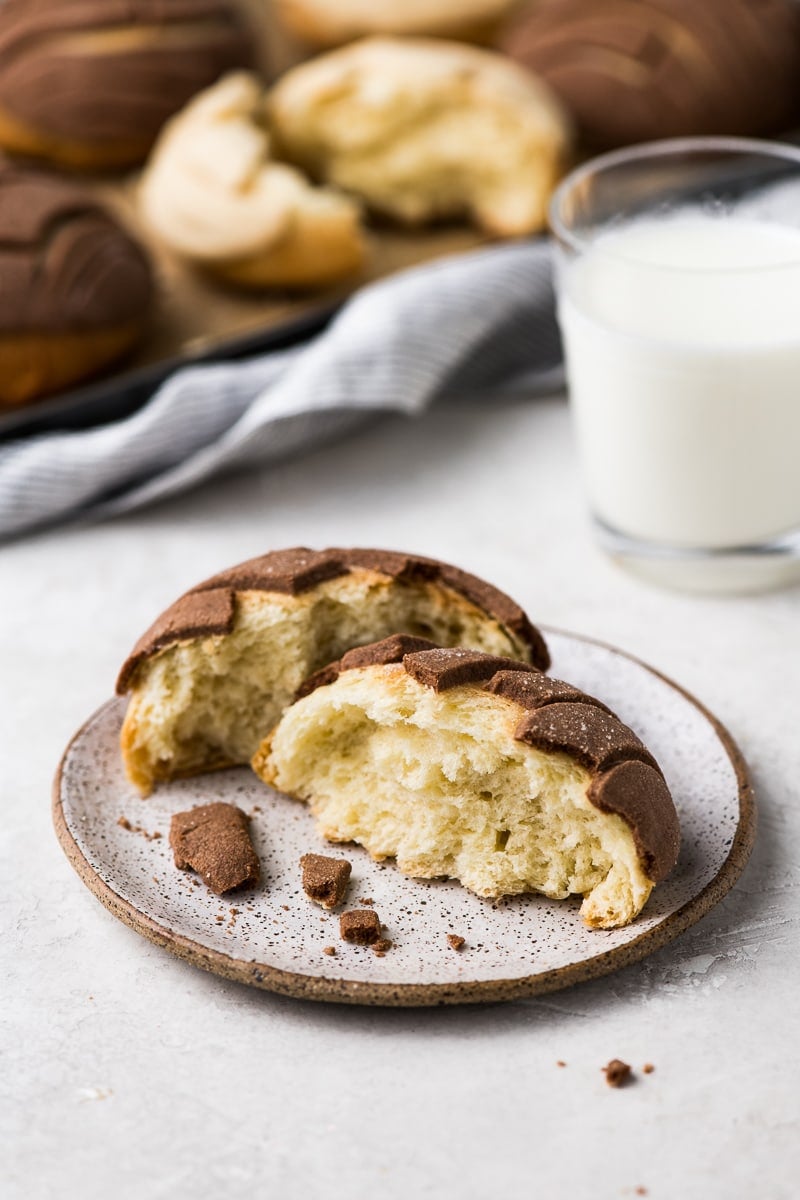
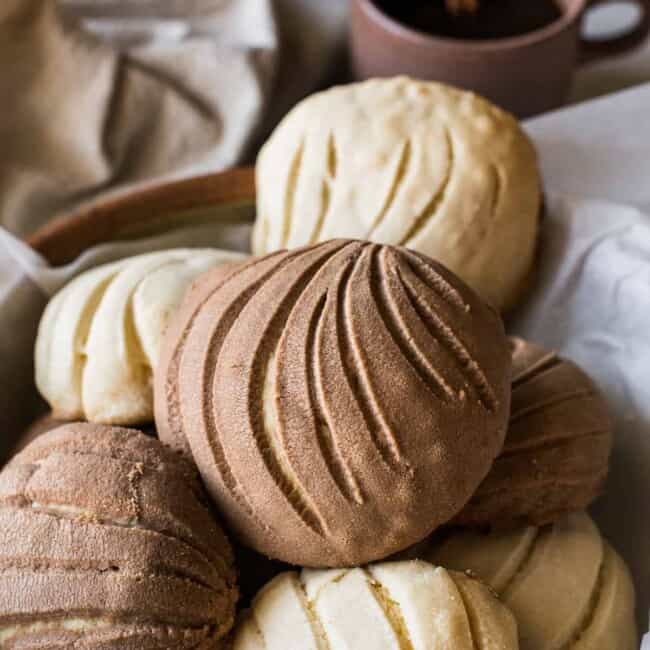
The word ‘concha’ translates to ‘shell’ in English, which describes their fun seashell-like appearance. The bread is lightly sweet, fluffy, and airy, and the topping is perfectly crunchy and oh-so-satisfying.
While this recipe is easy to make, it does require some patience because you have to let the dough rise. But I promise the end result is so worth it!
How to make conchas
Here’s how to make this popular pan dulce and have your kitchen smelling like a Mexican bakery!
1. Bloom the yeast: This is an important step in making sure your conchas are pillowy and soft. First, heat some milk in a small bowl or cup for 10-20 seconds until it reaches 105°F-110°F. Then mix in the yeast along with 1 tablespoon of sugar and loosely cover the bowl with plastic wrap. Let the mixture sit for a full 5 minutes until it’s bubbly and frothy.
2. Mix dry ingredients: While the yeast is blooming, mix together the flour, the remaining sugar, and salt in the bowl of a stand mixer.
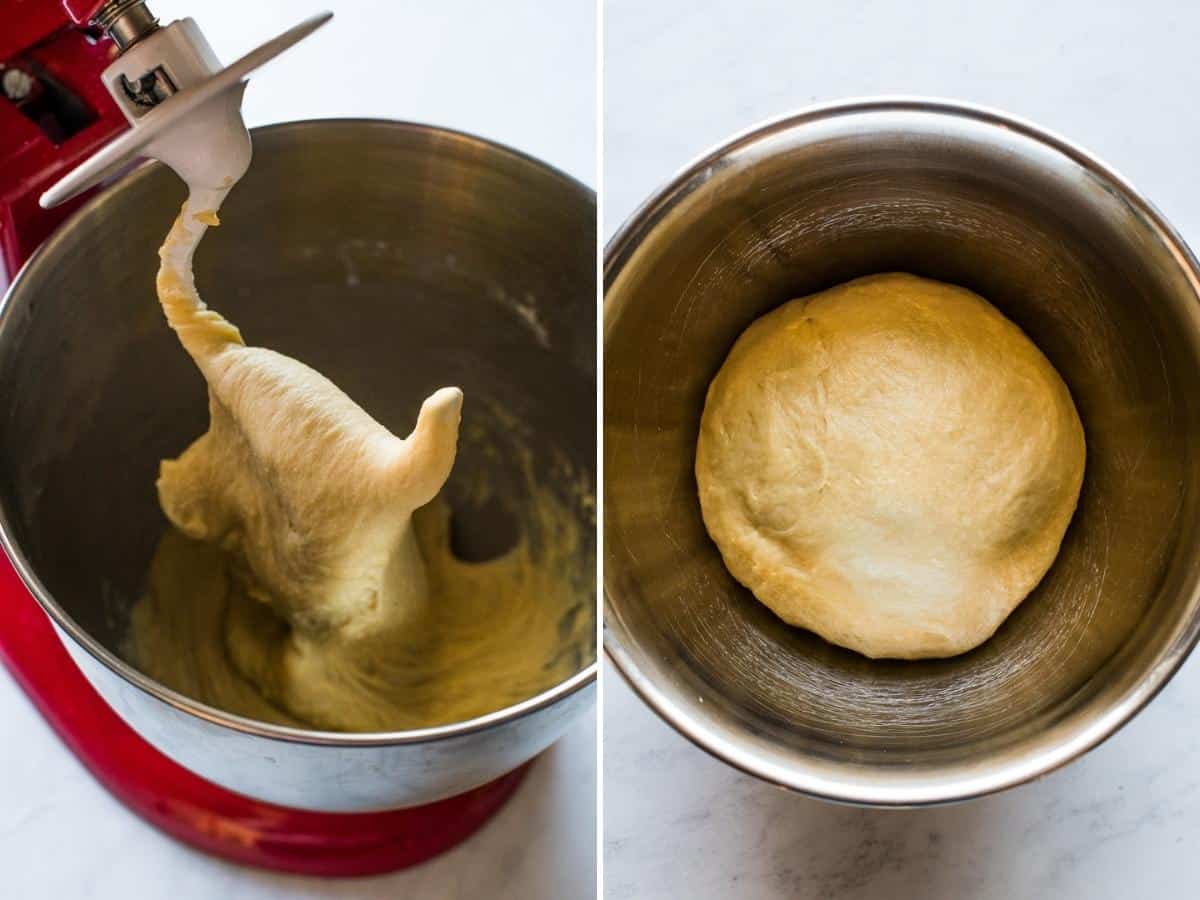
3. Add wet ingredients: Then add the melted butter and eggs and mix together again to lightly combine. Add in the milk and yeast mixture and knead everything together for 6-8 minutes until the dough is smooth and elastic.
4. Let the dough rise: In a greased bowl, add the dough and lightly cover with a kitchen towel. Let it rise for 2 hours until it doubles in size. A trick I like to use is preheating my oven for 2-3 minutes, and then turning it off and placing the dough in the oven so that it’s warm.
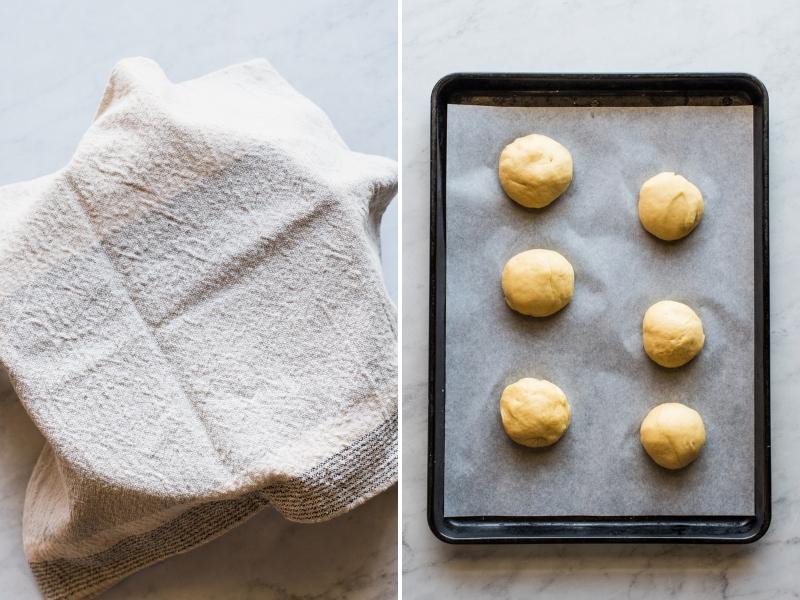
5. Shape the dough: Once the dough has doubled in size, divide it into 12 equal balls and place them on baking sheets lined with parchment paper. Cover and let those sit for another 1.5 hours.
6. Make the streusel topping: While the dough is rising again, make the flavored topping by adding flour, powdered sugar, and butter in a large mixing bowl and mixing until combined. You can use a stand mixer or handheld mixer.
7. Add flavoring to the topping: Make the vanilla-flavored topping by adding vanilla extract to half of the dough. Beat the mixture until fully combined. Make the chocolate-flavored topping by placing the other half of the mixture into the large mixing bowl. Add cocoa powder and beat until fully combined. Gather and divide each separate bowl into 6 equal balls. Set aside.
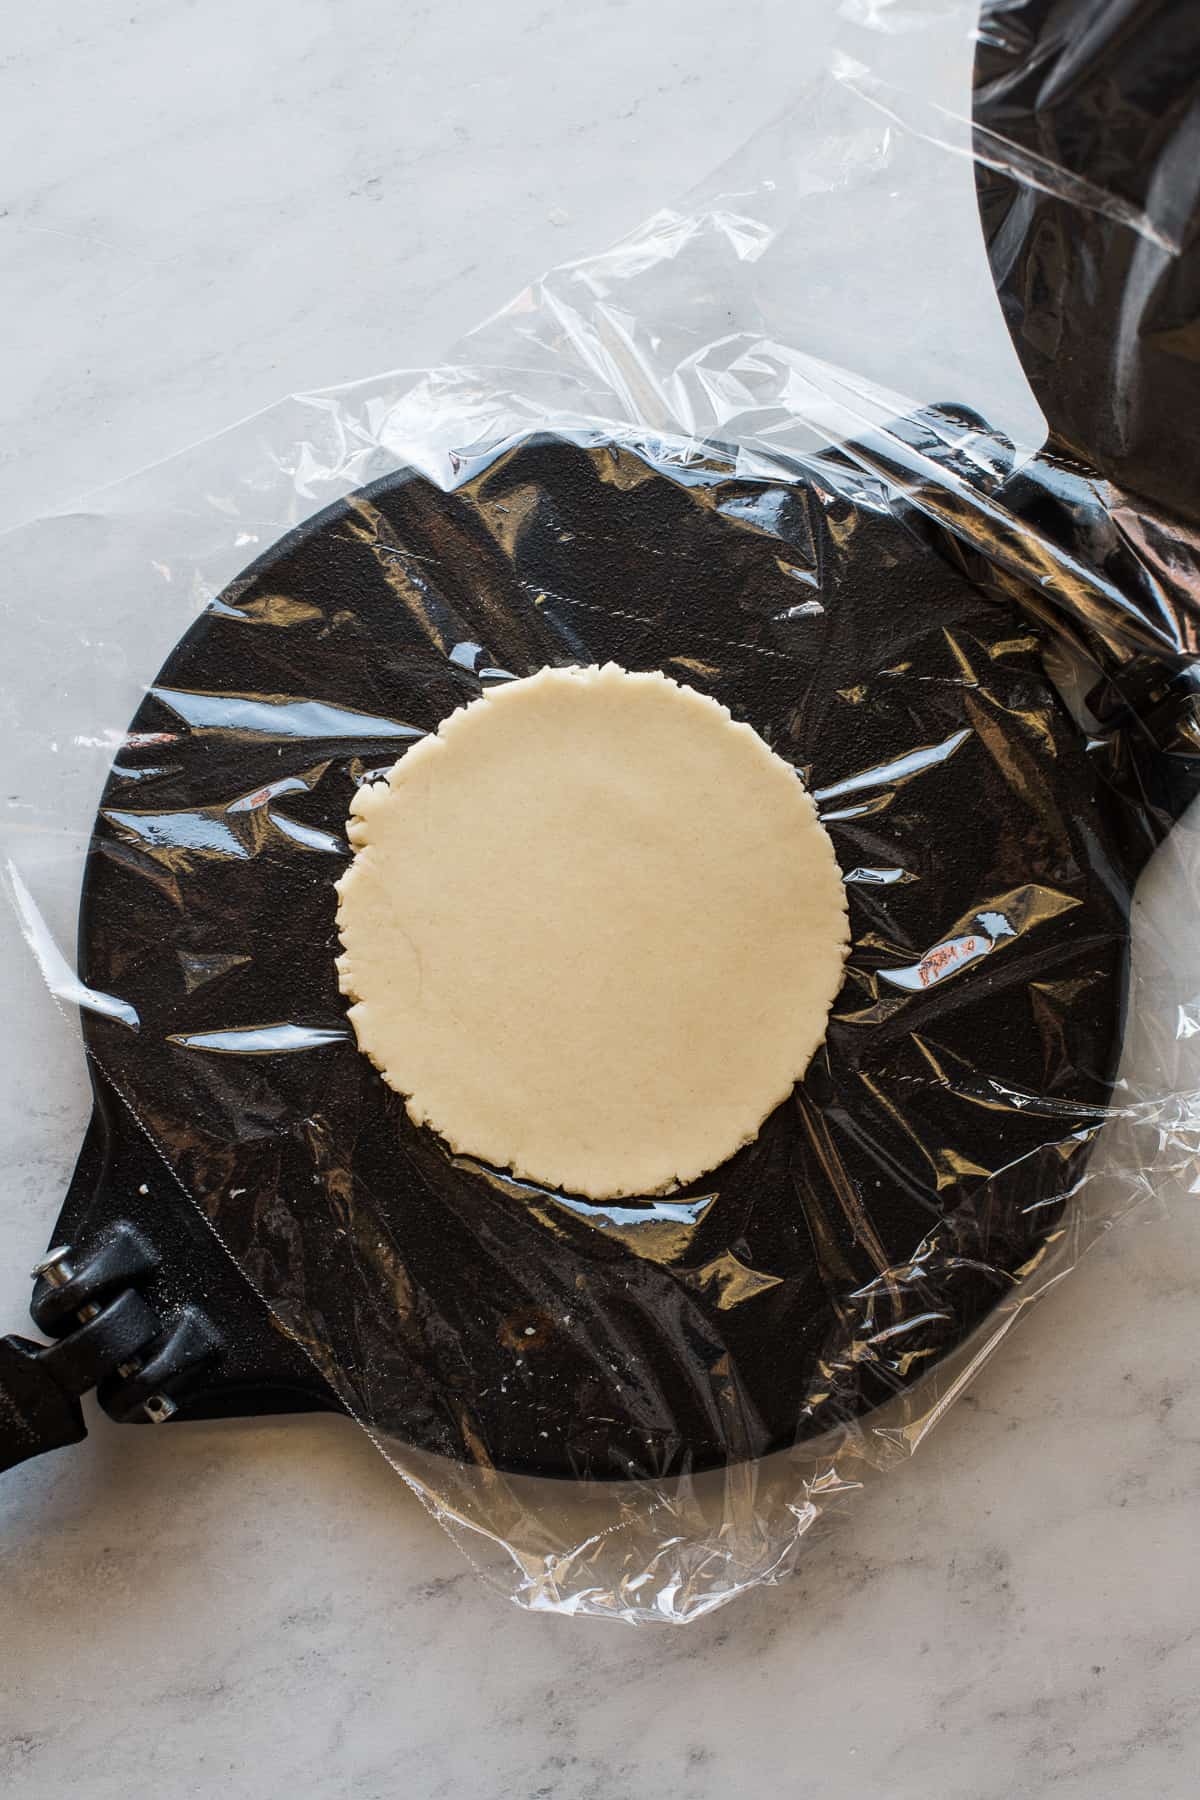
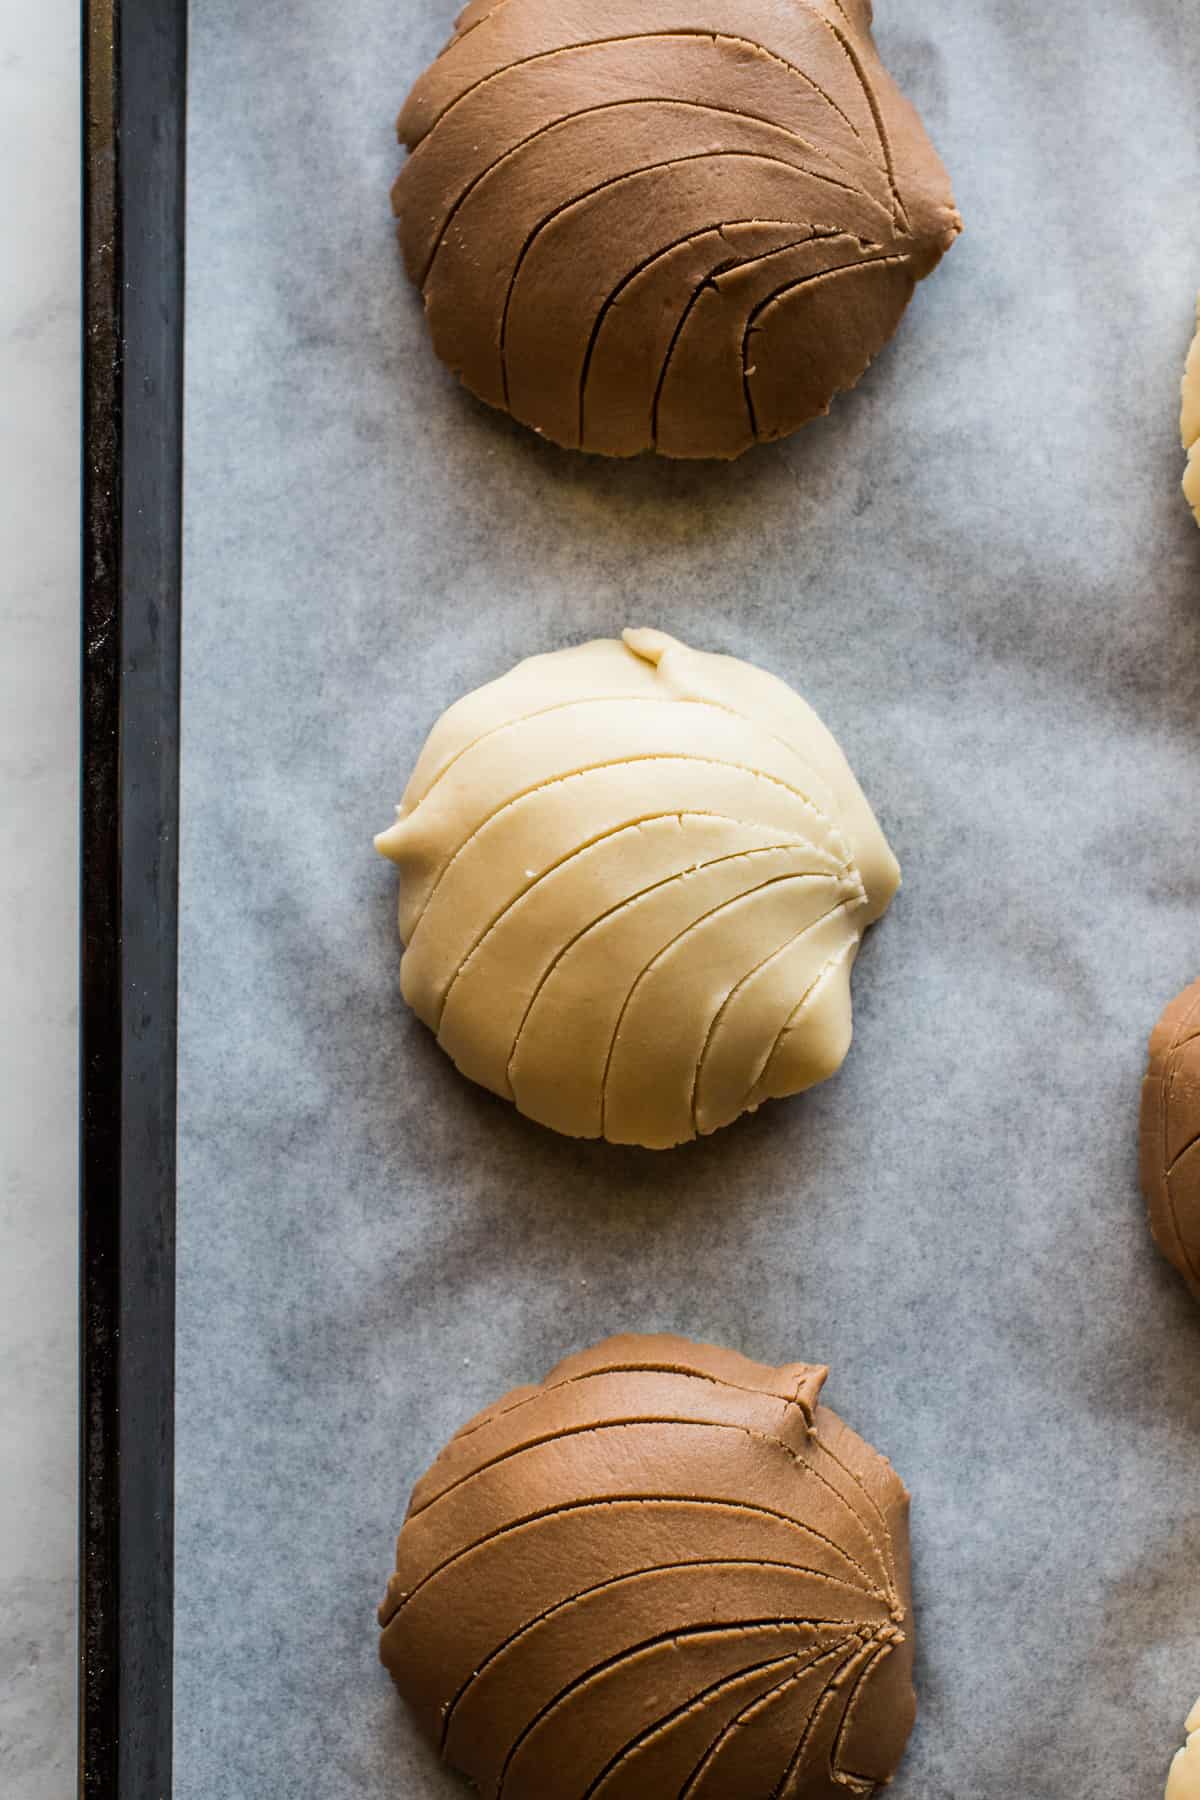
8. Shape the topping: Once the dough has finished rising, shape the topping. Using a tortilla press lined with plastic wrap, lightly press down on the dough ball to flatten it into a circle. Next, take a small knife and make the shell design. You can do this before transferring the topping onto the concha or while it’s on the concha. I’ve done both methods, and they both work.
9. Bake: Bake the conchas for 18-25 minutes at 350°F and enjoy!
This recipe makes a total of 12 conchas – 6 with a vanilla topping and 6 with a chocolate topping. If you prefer to make all vanilla or all chocolate, just double the amount of add-ins.
Tips for making the best conchas
- Make sure your yeast is alive before adding it to the dough. If the milk and yeast mixture is bubbly and frothy, that means the yeast is alive and thriving, which is great! If it’s not, that means the yeast is likely dead, and you need to start over with a new yeast packet.
- Be patient and give the dough time to rise. If you want light and airy conchas, you can’t rush the rising process. Make sure the dough about doubles in size during the first rise and then again once you’ve shaped the dough. I made this and let the dough rise about 2 hours the first time and 1.5 hours after the conchas were formed in a warm place. For me, that was on top of my fridge and the microwave, but if you make these during the winter and/or your house is on the cool side, it may take a little longer.
- If possible, use a tortilla press to flatten the topping. Just like when making corn tortillas, I find that using a tortilla press makes flattening out the topping so much easier and neater. Here’s the tortilla press that I have and recommend. If you don’t have one, that’s okay! You can still use a rolling pin.
Storing and Freezing
To store, transfer cooled conchas to an airtight container and store in a cool and dry place for up to 5 days.
To freeze, place cooked and cooled conchas in a single layer on a baking sheet and chill in the freezer for 1 hour. Then transfer the chilled conchas to a freezer-safe bag or container and freeze for up to 3 months.
To thaw, leave the conchas out at room temperature for 1-2 hours until softened.
More Mexican Desserts
Conchas (Mexican Pan Dulce)
Ingredients
For the concha dough
- ½ cup whole milk
- 2 ¼ teaspoons active dry yeast
- ⅓ cup granulated sugar, divided
- 3 ½-3 ¾ cups all-purpose flour
- ¾ teaspoon fine salt
- ½ cup unsalted butter, melted
- 3 large eggs, beaten
- 1 teaspoon oil, for greasing
For the streusel topping
- 1 cup all-purpose flour
- ⅔ cup powdered sugar
- ½ cup unsalted butter, room temperature
- 1 teaspoon vanilla extract
- 1 tablespoon unsweetened cocoa powder
Instructions
- Prepare the dough. In a cup or bowl, heat the milk in the microwave in 15-second increments or on the stove until it's just warm to the touch. A thermometer should read around 110°F-115°F.
- Stir in the yeast and 1 tablespoon of the sugar. Loosely cover with plastic wrap and let it stand for 5 minutes until it gets very foamy. If the mixture doesn't get foamy, throw it out and start again with a new packet of yeast.
- In the bowl of a stand mixer (or a regular large bowl), whisk together the all-purpose flour, remaining sugar, and salt.
- Attach the dough hook to the mixer and add the melted butter, eggs, and yeast mixture. Mix on medium-low speed for 6-8 minutes (or mix by hand), until the dough becomes smooth and elastic. The dough will be slightly tacky but not completely sticky. If it is still fairly sticky, knead in 1 tablespoon of additional flour at a time until smooth and elastic.
- Coat a large bowl with oil and transfer the dough to the bowl, shaping it into a ball. Cover it with a kitchen towel and let it rise for 2 hours until doubled in size.
- Line 2 large baking sheets with parchment paper and set aside.
- Divide the dough into 12 equal pieces and shape into balls. Place 6 balls on each of the prepared baking sheets and cover loosely with clean kitchen towels. Let the balls rise again for 1.5 hours in a warm place, or until doubled in size.
- Prepare the topping. Beat together the flour, powdered sugar, and butter in a large mixing bowl with a handheld mixer until light and fully.
- Divide the mixture into 2 equal pieces and place each halve in a small bowl.
- Make the white vanilla topping by adding vanilla extract to half of the dough, and beat until combined. Gather the dough with your hands, divide it into 6 equal pieces and shape into balls.
- Make the brown chocolate topping by adding cocoa powder to the other half of the dough, and beat until combined. Gather the dough with your hands, divide it into 6 equal pieces, and shape into balls.
- Lightly flatten each ball in between two sheets of plastic wrap using a tortilla press. You could also use a rolling pin to shape the topping into rounds.
- Assemble the conchas. Carefully remove the rolled out topping from the plastic wrap and drape it onto the risen concha dough. Lightly pat it down to secure the topping onto the dough.
- Preheat oven to 350°F. While the oven is preheating, cut grooves into the topping using a paring knife so it resembles a clam shell, a criss cross pattern, or whichever pattern you prefer.
- Bake for 20-25 minutes, until the dough is lightly golden brown. Allow to cool for 10 minutes before serving.
Notes
- Make sure your yeast is alive before adding it to the dough. If the milk and yeast mixture is bubbly and frothy, that means the yeast is alive and thriving which is great! If it’s not, that means the yeast is likely dead and you need to start over with a new yeast packet.
- To make shaping the topping a little easier, you could use concha shell cutter.
- Storage: Store leftover conchas in an airtight container in a cool and dry place for up to 5 days.
Nutrition
Nutrition information is automatically calculated, so should only be used as an approximation.


Hello, I was wondering if I could use 2% milk or will I have to use whole milk??
Hi Viviana! You can use 2% milk no problem!
Hola Isabel, for of all I want to thank you for this wonderful, delicious Easy to follow recipe! I’ve tried making conchas before several times, and they were just alright, after many attempts I just stopped making them, I love baking and I enjoy making bread but the conchas we’re just not my thing, until I found this recipe. I think I’ll be making this every weekend for family now, I made all 3 flavors and they we’re not only visually stunning but delightful as well.
Hello! Do I melt the butter or do I add it at room temperature? Thank You.
Hi! The butter needs to be melted for the dough, but room temperature for the topping.
Question…I made the conchas today and they were delicious…but very doughy…. did I maybe make my balls too fat and small… please help…I would love to make them again…
Hi Irma! There could be a few reasons as to why they were a little too doughy. They may have been a little undercooked and needed a some more time in the oven. It could be that the yeast didn’t rise the dough enough. I would also maybe try to remove them from the baking sheet as soon as you take them out of the oven and place them on a wire rack to “dry” so they don’t create steam on the pan and get soggy or heavy. Here’s a resource that may help.
I see that the dough uses unsalted butter, does the topping also use unsalted or regular salted butter?
Yes, it’s also unsalted. I’ll be sure to update the recipe so there’s no confusion. Thanks for catching that!
Made my first ever batch of conchas yesterday using your recipe and they came out beautifully! I’m thinking of trying pink ones next time, but want to try to avoid artificial coloring. Do you think dried strawberry powder would work in the topping?
I’m so glad you liked them! I’ve never used strawberry powder before, but I bet it would work! I think it’s worth a shot. Let me know if you try it – I’d to hear whether it worked or not.
First, I want to say that I’ve tried at least 8 different recipes for conchas and yours is the first one that worked perfectly! Thank you!
Second, I’m wondering, after the first rise, do you think the dough could be kept in the refrigerator overnight and finished in the morning or will that mess up everything?
Hey there! I’ve never tested the recipe that way so I can’t say if it will work or not. If you try it, let me know!
Can i let them proof over night? I am helping with a culture night and i want to bake them first thing in the morning so they are nice and fresh!
Hi! I’ve never tried proofing them for that long so I can’t say for certain. Sorry! If you try it, let me know!
I love conchas! We buy them every Sunday along with marranitos and empanadas! I am definitely going to try these two recipes. Would you happen to have a recipe for the pumpkin empanadas. Have not been able to find a recipe made with the soft bread. Thank you!
Do we have to use whole milk?
Soo can I just wait total of four hours and then form the dough balls. Or do I need to do this as a two step process.
Hi Patty, unfortunately it has to be a two step process. Letting it rise a second time after you’ve shaped the balls helps make them light and fluffy.