
This post may contain affiliate links. Please read our disclosure policy.

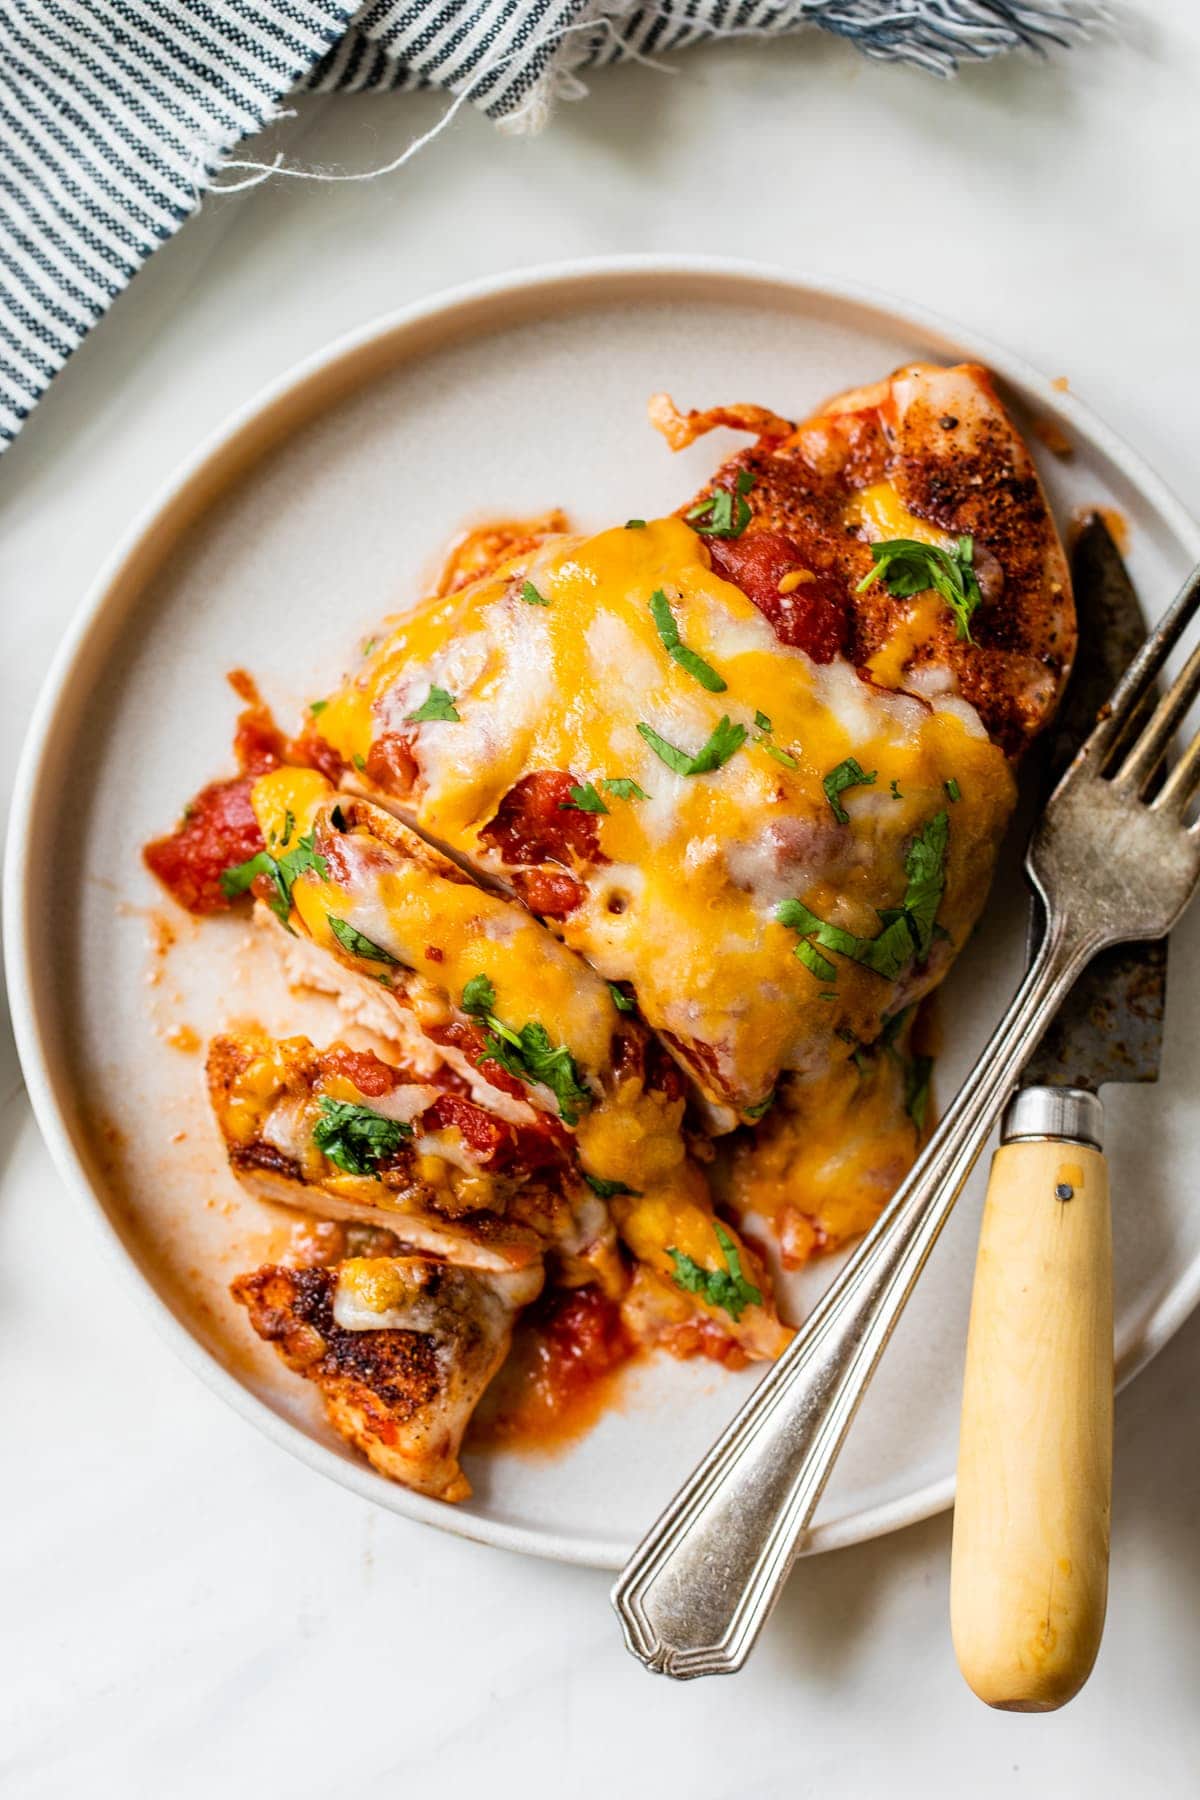
This tasty Salsa Chicken is a simple and healthy recipe made from chicken breasts flavored with Mexican spices, topped with a chunky salsa, and baked with melted ooey-gooey cheese! It’s an easy and delicious dinner the whole family will love.

Easy chicken dinners are one of my family’s favorite weeknight meals, and this salsa chicken has been my go-to lately! Made with tenderized seasoned chicken breasts, melted cheese, and chunky salsa, it’s a bubbly, cheesy, and healthy recipe the entire family will love. Plus, it makes great leftovers!
(Other easy chicken dinners I’ve been obsessed with are this salsa verde chicken and crockpot chicken fajitas. 😋)
You can easily prepare it ahead of time, set it and forget it in a slow cooker, or serve the leftovers for delicious weekday lunches. Serve it alongside some authentic Mexican rice and Mexican roasted potatoes for a dinner that will leave you feeling full and satisfied.
Salsa Chicken Ingredients
- Chicken breasts – Boneless skinless chicken breasts work best in this recipe but it’s delicious with chicken thighs as well.
- Chunky salsa – A flavorful salsa on the bottom of the dish bakes into the chicken to give it zesty and fresh flavors. Go ahead and use your favorite jarred chunky salsa or make it with homemade salsa instead.
- Shredded cheese – A layer of cheddar, Monterey Jack, Mozzarella, or a Mexican blend of cheeses will melt on top of the chicken as it bakes, making each bite gooey and delicious.
- Mexican seasonings – A blend of onion powder, chili powder, cumin, garlic powder, and smoked paprika is needed to properly season the chicken.
- Cilantro – For a fresh garnish.
How to Make Salsa Chicken in the Oven
Preheat your oven and mix all the spices together in a small bowl.
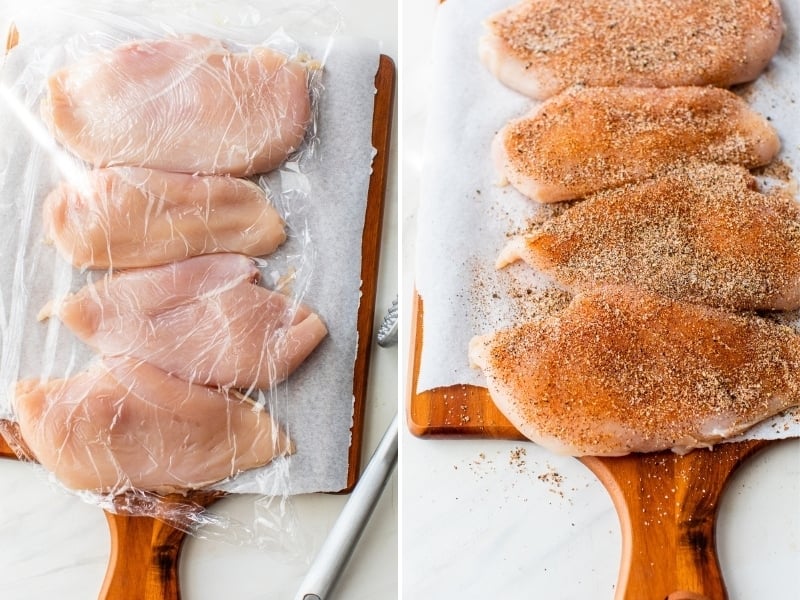
Tenderize the chicken breasts using a mallet or a heavy cast-iron skillet until each breast is about ¾ inch thick. Season both sides with the spice mix.
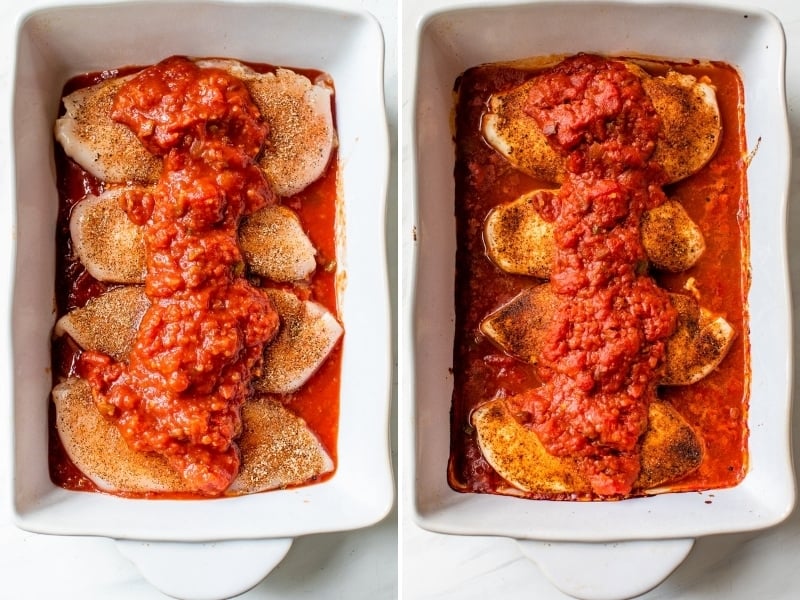
Spread the salsa on the bottom of a baking dish, then add the seasoned chicken breasts on top. Spread the remaining salsa evenly on top of the chicken.
Bake until the chicken is cooked through, top it with the shredded cheese, and broil until the cheese is melted. Let it cool for 5 minutes and serve hot with rice, veggies, or salad.
Recipe Tips
- To make this with chicken thighs instead, bake them for 35 to 40 minutes or until the internal temperature reads 165ºF on a meat thermometer.
- Want to change up the salsa? Go for green by using a salsa verde instead of the classic red. I recommend sticking with a chunky salsa though, so if you make your own, keep it chunky!
- Add some chopped onions, beans, or corn to the bottom of the baking dish before adding the chicken to make it a more well-rounded meal.
- Mix up the seasonings. Add a sprinkle of cayenne pepper or some diced jalapenos into the salsa for some added spice. Alternatively, you could use a packet of taco seasoning instead to save a little extra time!
- Make sure the chicken cools for about 10 minutes after baking. This will give the chicken some time to redistribute its juices to keep it nice and tender.
- Tenderize the chicken breasts evenly. When pounding the chicken, make sure each piece is at an even thickness so they all cook evenly.
- Make sure the chicken is cooked through. The best way to do this is to use a meat thermometer to measure the internal temperature. Once each breast reaches 165ºF, they’re ready to eat!
Slow Cooker Method
If you’d rather set it and forget it, make the salsa chicken in a slow cooker instead!
Season the chicken breasts (no need to pound them out) and layer them in the bowl of a crockpot with the salsa. Cook on high for 3 to 4 hours or low for 6 hours.
During the last 5 minutes of cooking, add the shredded cheese on top of the chicken and place the lid back on so it can melt. Serve hot and enjoy!
Storing and Reheating
To store: Cooked and cooled salsa chicken can be stored in an airtight container in the fridge for 3 to 4 days.
To reheat: The best way to reheat baked salsa chicken is to add it back to a baking dish, cover it with foil, and bake at 325ºF for about 15 minutes or until it’s heated through. Otherwise, heating it in a microwave for a few minutes works well too.
More Easy Recipes

Cheesy Baked Salsa Chicken
Ingredients
- 1 teaspoon kosher salt
- 1/2 teaspoon freshly ground black pepper
- 1/2 teaspoon onion powder
- 1/2 teaspoon chili powder
- 1/4 teaspoon ground cumin
- 1/4 teaspoon garlic powder
- 1/4 teaspoon smoked paprika
- 4 medium boneless skinless chicken breasts
- 2 cups chunky salsa
- 1 cup shredded cheese
- chopped cilantro for garnish
Instructions
- Preheat oven to 375ºF.
- Add salt, black pepper, onion powder, chili powder, cumin, garlic powder, and smoked paprika to a small bowl. Mix together to combine and set aside.
- Line a large cutting board with plastic wrap or parchment paper. Lay chicken breasts on top in a single layer, and then cover with another piece of plastic wrap or parchment paper.
- Using a meat mallet or a heavy skillet (cast iron works best), pound each breast to about 3/4-inch thickness.
- Sprinkle the seasoning mix evenly on both sides of the chicken breasts.
- Pour 1 cup of salsa onto the bottom of the baking dish and spread out evenly.
- Place chicken breasts on top and spoon the remaining salsa on each one.
- Bake for 35 minutes, or until chicken is tender, juicy, and fully cooked through. (The internal temperature should read 165ºF with a meat thermometer.)
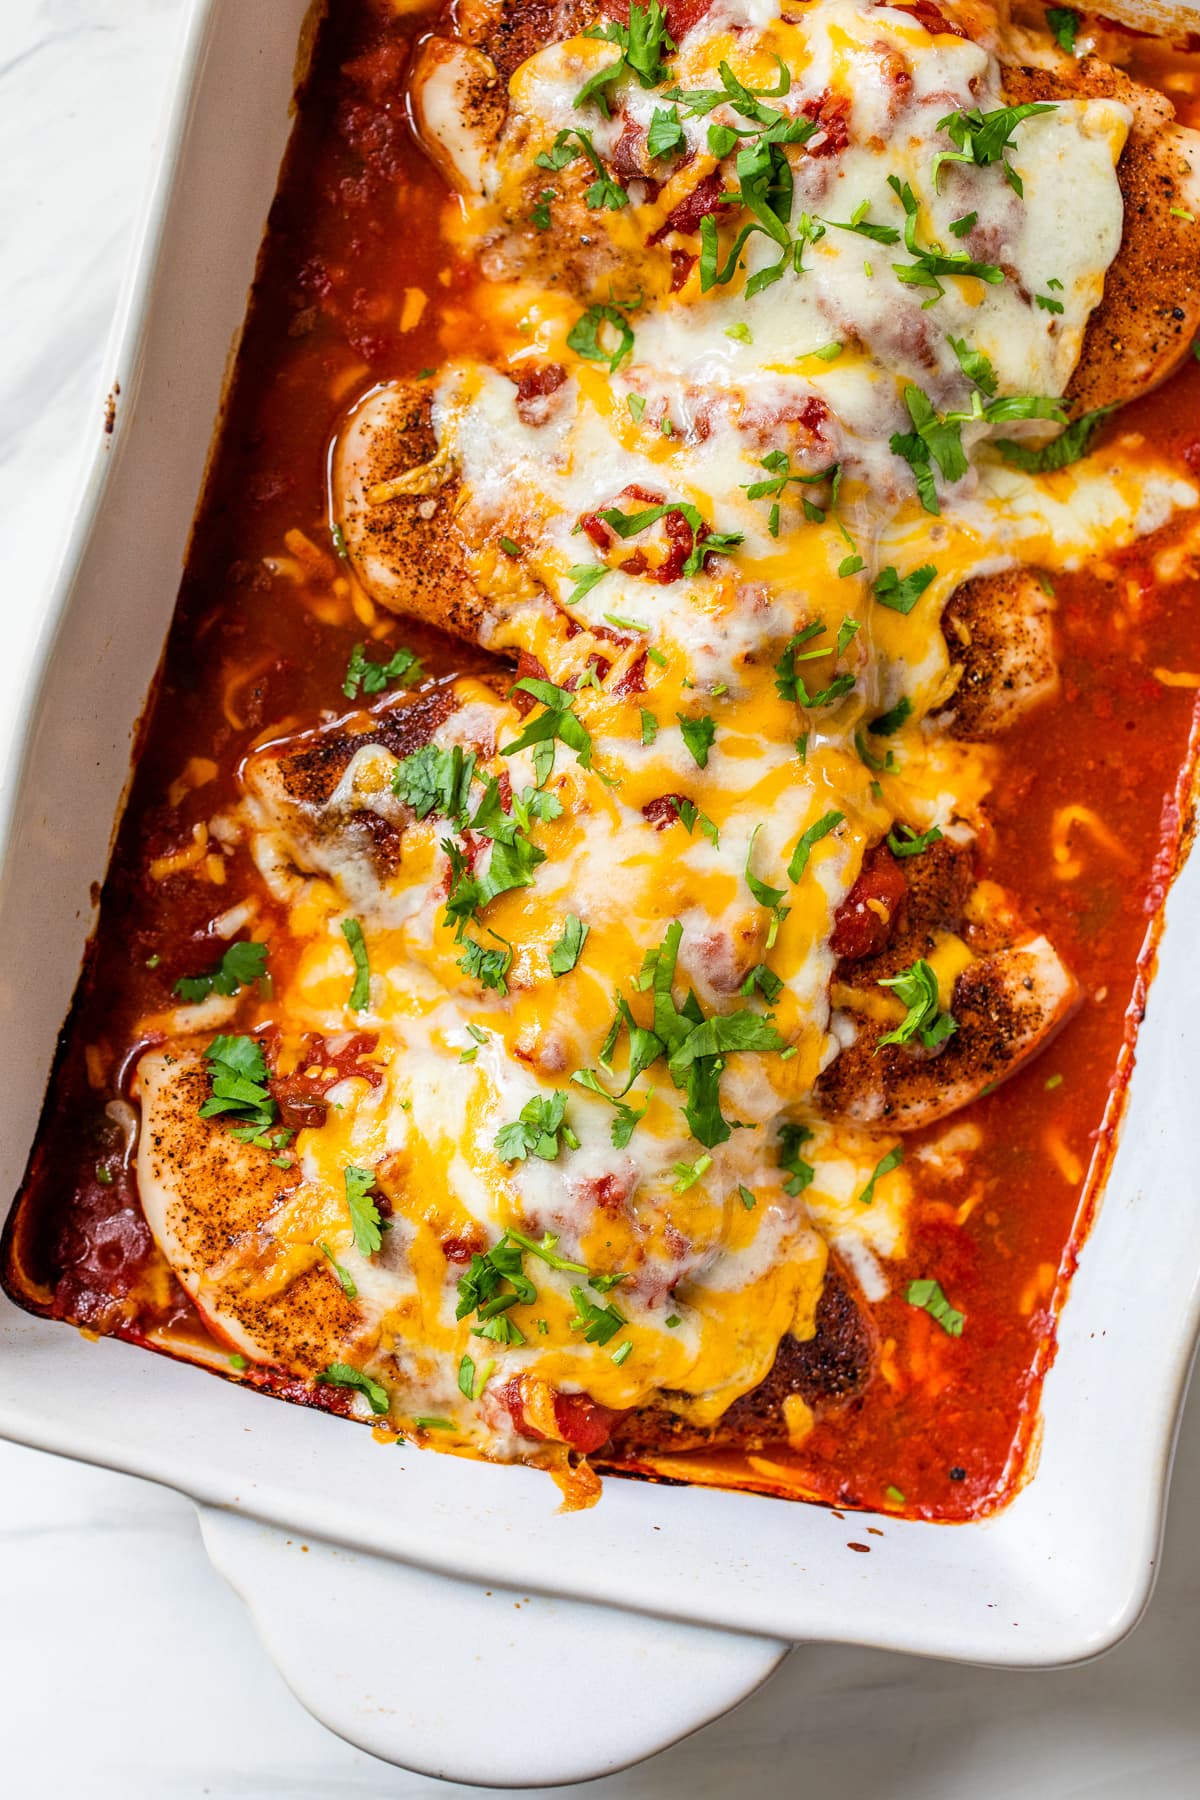
- Remove from oven and sprinkle the top of each chicken breast with cheese.
- Turn the oven broiler on high, place chicken under the broiler, and broil for 1-2 minutes, or until the cheese is melted and bubbly.
- Remove from oven, let cool for 5 minutes, and serve.
Video
Notes
- Cheese: Cheddar, Monterey Jack, Mozzarella, or a Mexican-blend shredded cheese all work in this recipe!
Nutrition
Nutrition information is automatically calculated, so should only be used as an approximation.


It was a big HIT!! I am going to make it again soon😊
I’m not sure why you need to pound them thin. I think I would skip that step.
I think she said that so that it will cook evenly. Some breasts are very thick on one end and skinny on other other. When you check the temp for 165 (or even 162-263 since it will go higher when you rest the chicken for 10 minutes), the skinny end will be more cooked. A good solution and tip to make your baked chicken breasts tender and juicy is the brine them first in salt water for at least 15 minutes (I usually do around 30-1hr). I always brine my boneless chicken and they come up so juicy. Also read that best temp to cook chicken this way is to cook on high 450 for about 17-20 min (make sure to check temp however depending on oven).
Hi Scott! Thank you so much for sharing your tip!
I made chicken tacos and have a lot of extra meat. Do you have any ideas?
Hi Tammie! You can chop up the chicken use it as a filling for nachos, burritos, or taco salad/bowls!
So easy and tasty. Also low in Weight Watchers points. It tasted even better the second day
Hi Sue! I’m very glad you enjoyed it!
I have made many of your dishes and have loved every one of them thank you so much please keep posting you great recipes